Topography
This option loads and manages the topography. Adding topographical information can be useful for a better representation and analysis.
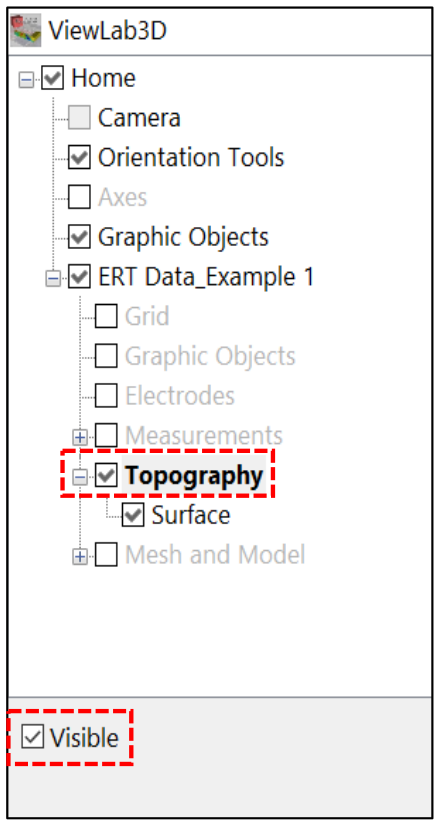
Figure 106 Topography properties
To make the topography visible check Visible on the Topography Panel.
The Topography node has also a second child node named Surface. The Surface option is used to manage the way the topography is displayed, as points or as a surface that interpolates each point. The Surface panel is composed of two blocks:
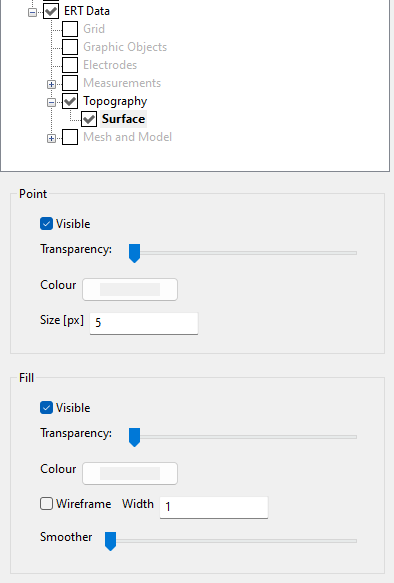
Figure 107 Surface properties
Point
It manages the visualization mode of the points in the topography file. Each coordinate triplet corresponds to one point in the Surface visualization.
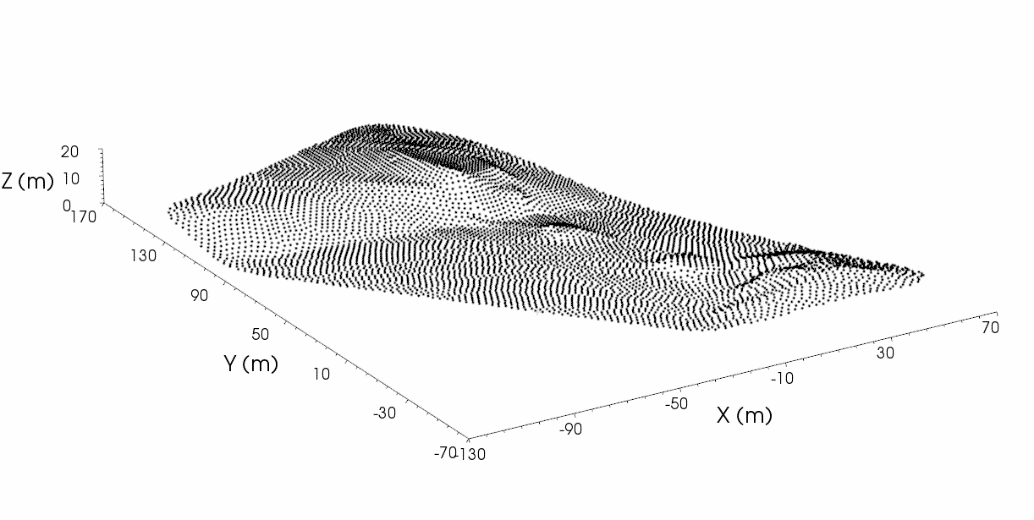
Figure 108 Example of Surface visualized as points
Checking Visible in the Point Window visualizes the topography in the 3D scene as simple points.
It is possible to alter the level of Transparency through the slider, the Colour and the Size of the topographic points (Figure 109).
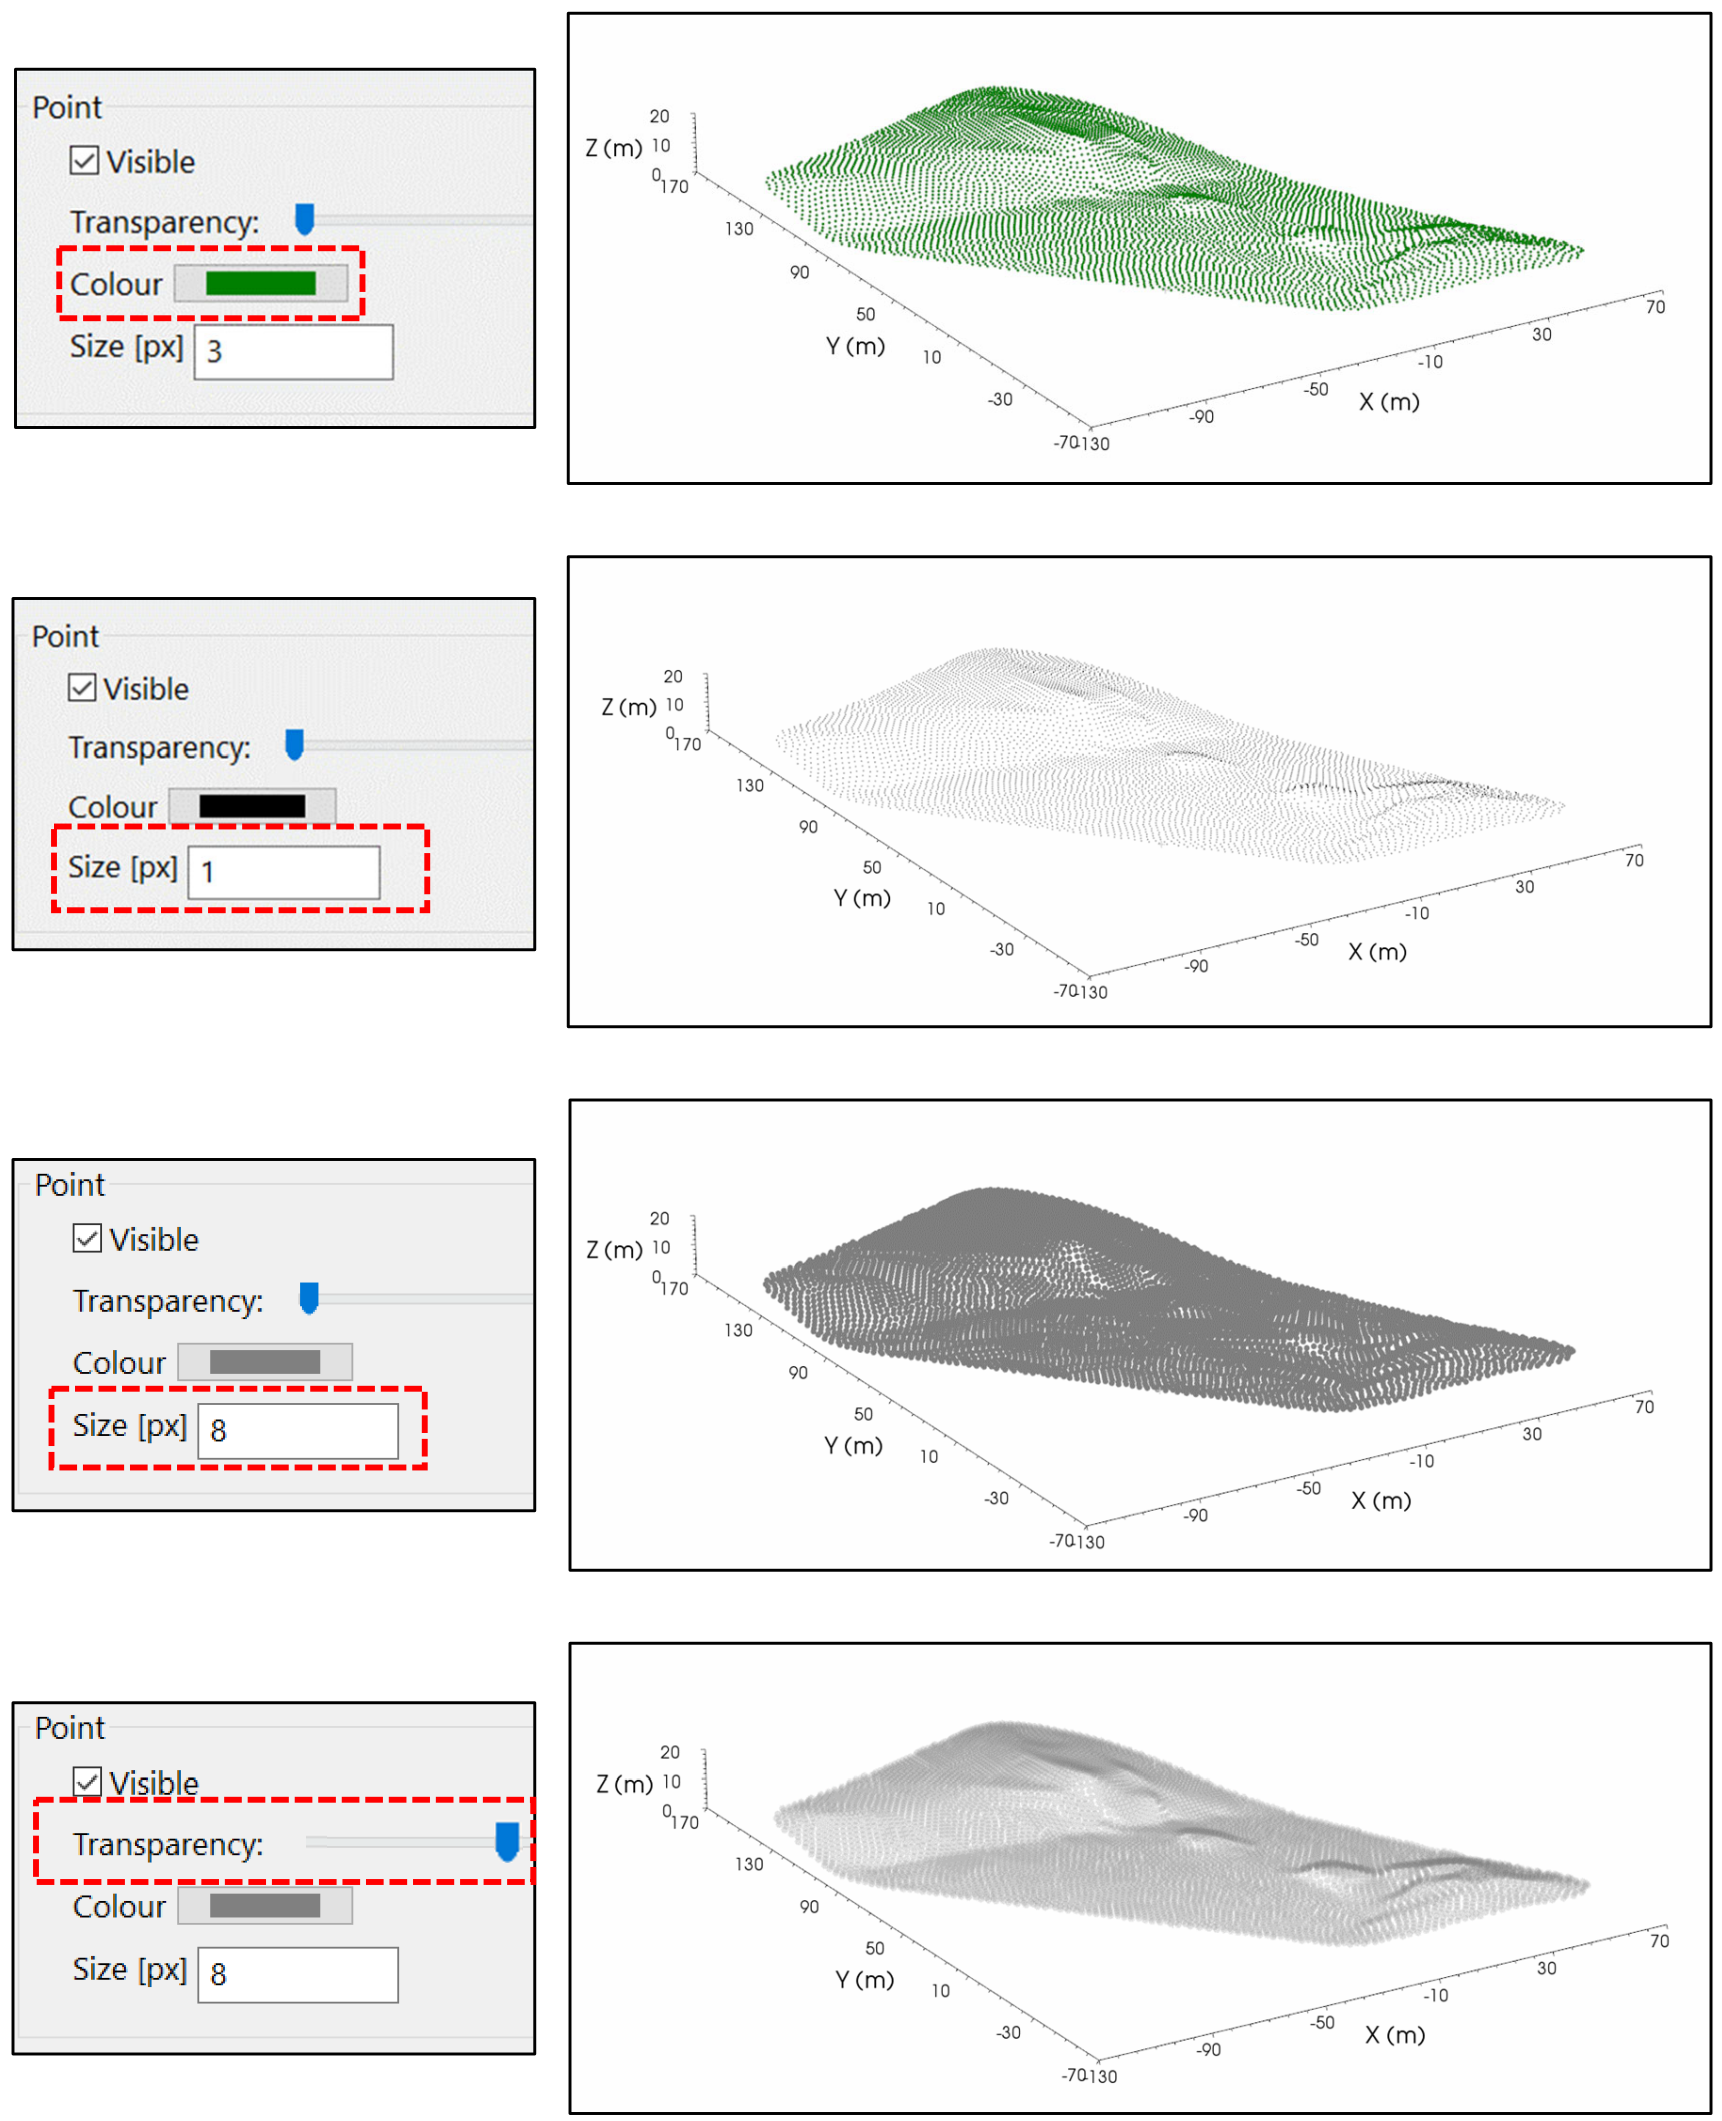
Figure 109 Examples of different sizes of surface points
Fill
manages the representation of the topographic points as a surface that interpolates each point. In addition to the same Point window options, it has some additional elements, highlighted in red in Figure 110.
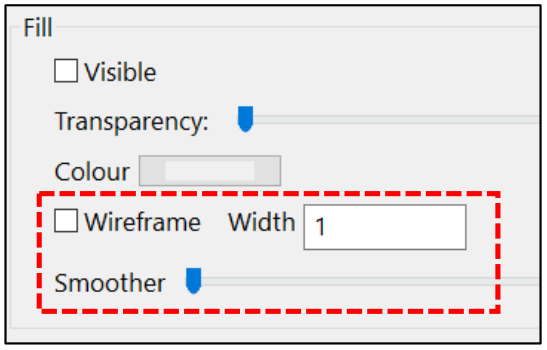
Figure 110 Fill surface panel
If the checkbox “Wireframe” is checked, the topography is visualized as a 3D model in which only lines and vertices are represented.
Otherwise the entire surface is visualized (Figure 111).
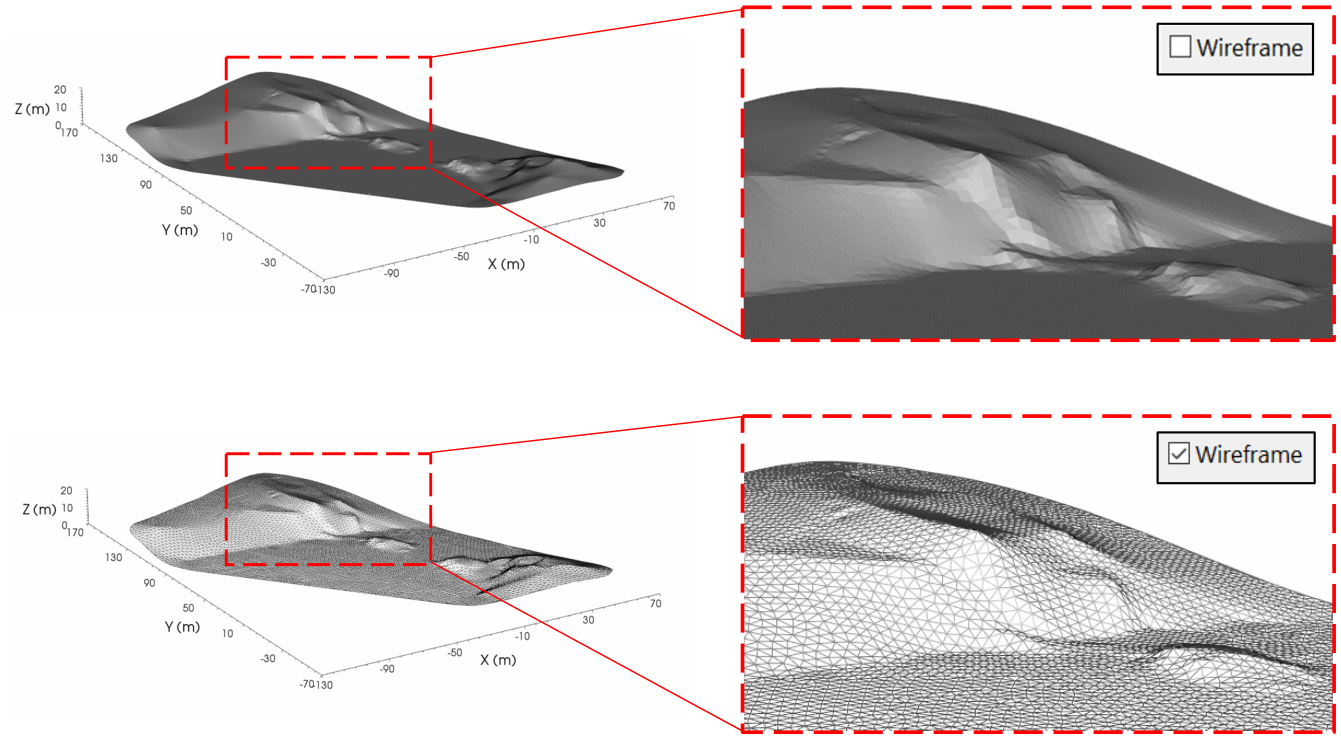
Figure 111 Surface visualized as wireframe
If the Wireframe mode is active, it is possible to choose the Width of the lines that constitutes the topography, typing the desired number in the proper box.
In Figure 112 the default value 1 is changed in 3.

Figure 112 Examples of different size of wireframe width
The Smoother slider allows to smooth the topography. It is advisable to not make it to smooth in order to not cause a slowdowns of the software.
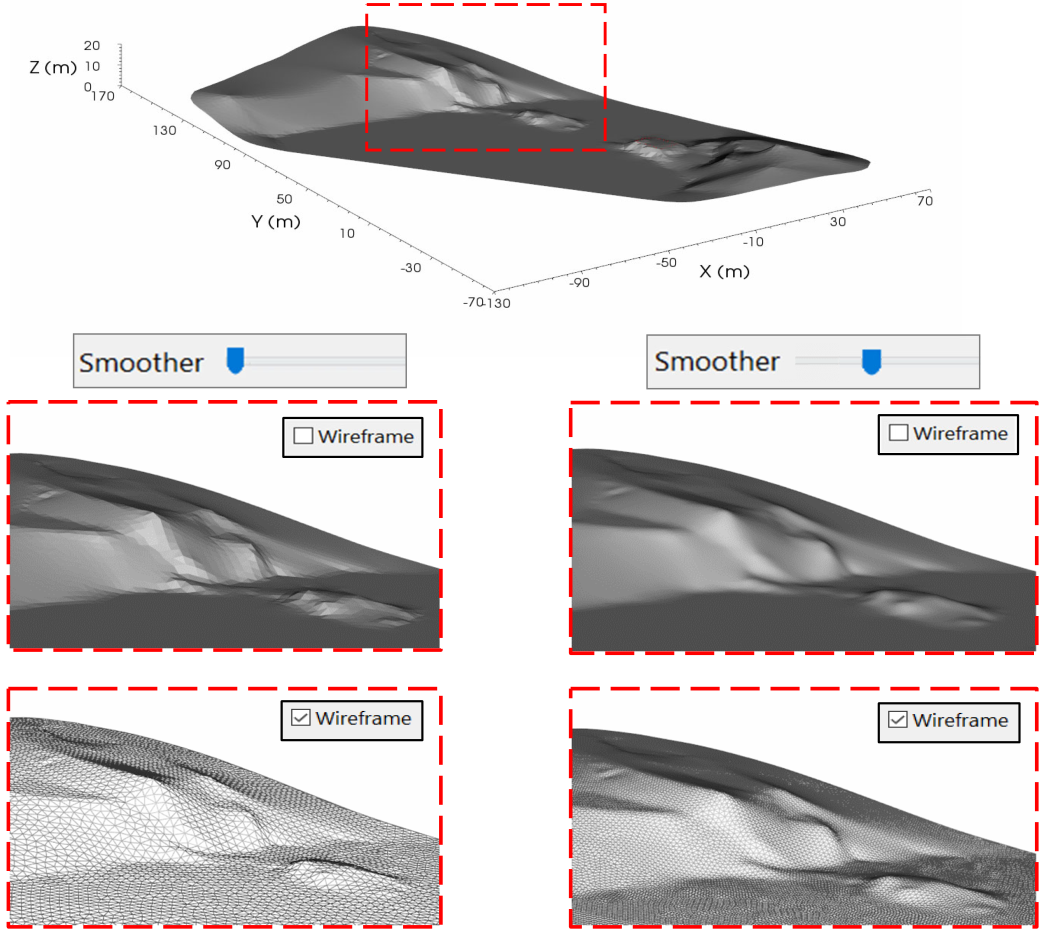
Figure 113 Example of surface topography smooth, with and without wireframe mode active